Are you asking yourself whether Druk Path Trek is an extremely challenging trekking adventure? If yes, then let us make this clear – it is a moderately challenging trekking route. You do not need any technical climbing tools like ropes or ice axes, but this does not make it an easy walk. Walking for hours on rugged trails, hiking on an uphill trail, and adapting to the high altitude are the key challenges of this trekking adventure.
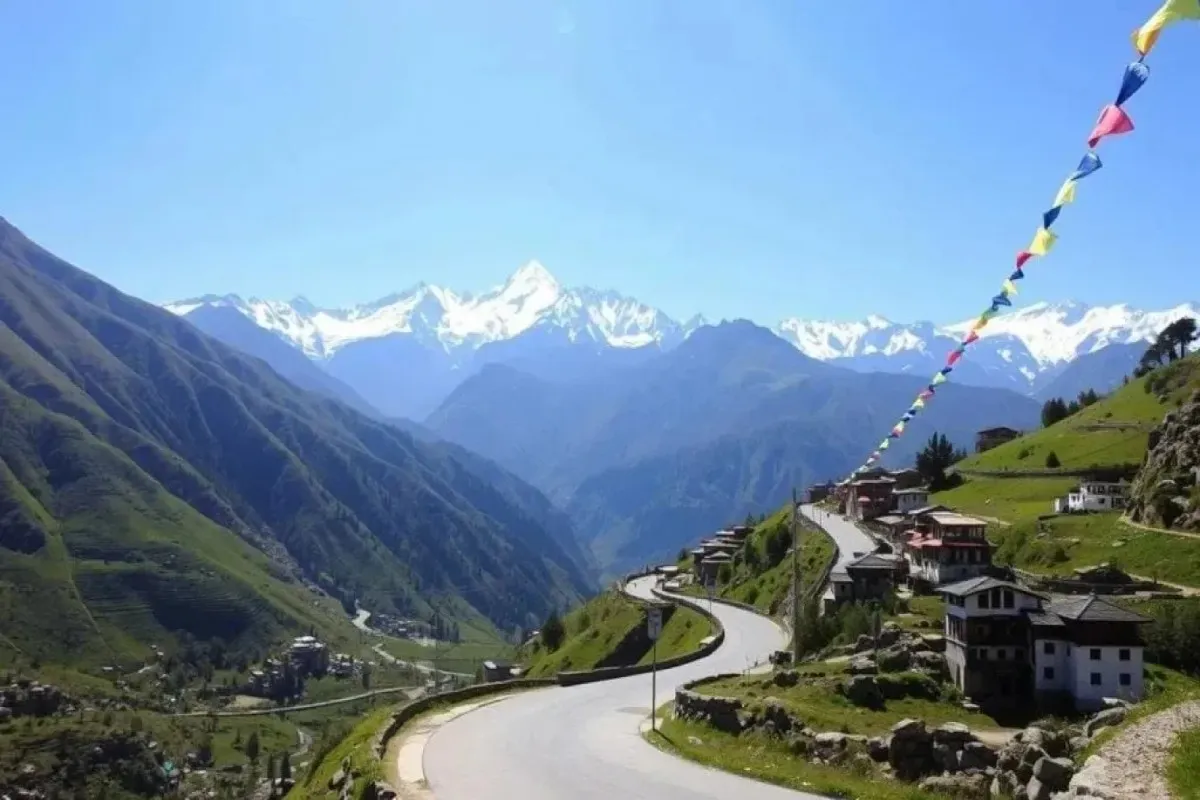
Druk Path Trail runs between the Paro Valley and Thimphu valley, offering forest trails, picturesque ridges, and stunning high-altitude lakes on the way. For those considering Bhutan trekking tours, this route offers an appealing mix of nature, altitude, and cultural experiences. The highest elevation that you can expect depends on your chosen itinerary and it may be up to 4,200 meters. The trek is manageable for beginners provided that they have decent physical fitness. But again, it should not be perceived as an easy weekend trekking trip. In this Druk Path Trekking guide, you will learn what to expect daily, including elevation gain, walking time and distance, and required physical fitness.
How hard is the Druk Path Trek?
The Druk Path Trek is rated as moderate. This means you do not have to be a trekker, but you should be in good shape. You will be walking on mountain paths for hours, and some parts involve walking up hills for a long time.The Druk Path Trek is not hard to do. You usually do not need ropes, ice axes or special climbing skills. The hardest part is the work. Walking for periods, rough paths, hills, and high altitude can make the trip tiring.
The route becomes harder as you go higher. You begin near Paro, which's much lower than the high camps, and slowly move toward places above 3,500 meters. When you get to Simkotra Tsho, you are, at 4,110 meters. So if you are usually active and like to walk for times the Druk Path Trek can be doable. If you do not exercise much and are not used to walking up hills, you should get ready before the Druk Path Trek.
What Makes the Druk Path Trek Physically Challenging?
The Druk Path Trek is tougher than a hike for several reasons. One big thing is all the walking. The Druk Path Trek has some long climbs that can make your legs feel tired, especially at the beginning of the trip.
The altitude of the Druk Path Trek is also a challenge. As you go higher up on the Druk Path Trek, the air gets thinner. Your body needs time to get used to it. The trail on the Druk Path Trek is not always easy to walk on. You will be on forest paths, mountain ridges, and rocky parts with ground on the Druk Path Trek. You should also think about how you will be walking each day on the Druk Path Trek. Some days on the Druk Path Trek are 5 or 6 hours of walking; some days are 6 or 7 hours. A few days are even 8 to 10 hours on the Druk Path Trek.
The weather can make the Druk Path Trek harder too. It is best to go on the Druk Path Trek in the spring or autumn. If it is too cold or wet, the mountain trails on the Druk Path Trek can be really uncomfortable. The good news is that you do not need to know how to climb mountains to do the Druk Path Trek. The Druk Path Trek is about being able to walk for a long time, going at a steady pace, and being ready, for the high altitude of the Druk Path Trek.
Druk Path Trek Difficulty at a Glance
The Druk Path Trek is generally considered a moderate hike, so you won't need any technical climbing skills to do it. The trail takes you through forests, along ridgelines, and across some rocky or uneven sections. Depending on your exact route, the highest point you'll reach is around 4,200 meters. Most itineraries span about 4 to 6 trekking days. The main challenge here is dealing with the altitude combined with the uphill walking, which is why having a moderate to good level of fitness is recommended. While previous trekking experience is definitely helpful, it isn't strictly necessary as long as you are physically prepared and comfortable walking for several hours a day.
One thing worth flagging early - route length and daily distances aren't identical across every operator. Some itineraries stretch the trek to 6 or 7 days with gentler daily stages, others compress it into 4 or 5 longer days. Always check the specific day-by-day plan your operator gives you rather than assuming it matches exactly what's written here.
Druk Path Trek Altitude: How High Does It Go?
Altitude is one of the things you need to know before going on the Druk Path Trek. The trek begins in the Paro area at around 2,250-2,280 meters. Then slowly goes higher. The path goes from Paro to Jele Dzong, Jangchulakha, Jimilangtsho, Simkotra Tsho, and then down toward Thimphu.
On the days you are trekking, you arrive at Jele Dzong at 3,400 meters. The next part of the journey takes you higher toward Jangchulakha, around 3,400-3,650 meters. Jimilangtsho is around 3,870 meters while Simkotra Tsho is listed at around 4,110 meters.
This slow increase is important because your body needs time to get used to the altitude. You might find that you walk slowly as you go higher. This is normal. There is no need to hurry. Pay attention to your body, keep a pace, drink enough water, and let the guide know if you feel sick.
Druk Path Trek Elevation Profile: Day-by-Day
The Druk Path Trek has a 7-day schedule. The first day and the last day are mostly for arriving and traveling, while Days 2 through 6 are for the walking. The exact walking experience can change based on weather and the condition of the trail. The main path is from Paro to Thimphu.
Day 1 - Arrival in Paro
The day is not a big walking day. You arrive at Paro International Airport, go to your hotel, and have time to rest and explore Paro if you want to. Paro is about 2,250 to 2,280 meters high. This day is easy. Gives you time to meet your guide, check your gear, and get ready for the walking days to come.
What makes this day stand out is the sheer amount of climbing packed into a single stage. Several published itineraries report roughly 1,000 m or more of ascent on this first trekking day alone - a big jump for legs and lungs that haven't yet adjusted to the altitude.
Why Day 1 Feels Hard
- Your body hasn't acclimatized yet, so the climb feels harder than the same elevation gain would at lower altitude
- The ascent is front-loaded - a big chunk of the day's climbing happens early
- Breathing can feel noticeably harder as you gain height
- The trail stays steep for extended stretches without much flat relief
How to Prepare for Day 1
- Start slow - resist the urge to match a faster hiker's pace
- Take short breaks regularly rather than pushing through in one go
- Stay hydrated from the very first hour
- Don't treat it as a race against other trekkers in your group
- Use trekking poles if you're comfortable with them, especially on the steeper sections
- Keep your daypack light - carry only what you need during walking hours
Day 2 - Damchena Village to Jele Dzong
The real trekking begins on Day 2. You drive from Paro to Damchena Village and start walking from there. The hike to Jele Dzong takes around 5-6 hours. The trail gradually climbs through fields, forests and pine trees. As you gain altitude, you can see views of Paro Valley and Mount Jomolhari. After several hours of climbing, you reach Jele Dzong at around 3,400 meters, where you spend the night.
Day 3 - Jele Dzong to Jangchulakha: Gradual Altitude Gain
The first day was really tough, but this part of the trip is a little easier. You still have to be careful though. Jele Dzong to Jangchulakha is 10 km, and it takes around 3 to 4 hours to walk.
On the way, you will see a lot of trees and beautiful rhododendron flowers on the hills. Then you will get to the campsite, which's usually at a height of around 3,770 to 3,780 meters.
This day is generally rated moderate. The elevation gain itself is smaller than Day 1, but don't underestimate it - moving from one high altitude to a slightly higher one can feel surprisingly tiring even on a "shorter" walking day, simply because your body is still adjusting.
Day 4 - Jangchulakha to Jimilangtsho: Ridge Walking at Altitude
The walk on Day 3 is 11 kilometers, and it takes around 4 hours to complete. You will be walking on a ridge with some parts going up. Some parts going down. This part of the trip takes you to Jimilangtsho, which's a lake that people around here know has trout. The campsite for Jimilangtsho is usually at an altitude of 3,870 to 3,880 meters.
Why Altitude Starts to Matter More
- Your walking pace will likely slow down naturally, and that's completely normal
- Breathing becomes more noticeable, even on gentler terrain
- Recovery between exertion bouts can take a little longer
- Good pacing -not pushing too hard between rest points - becomes more important than raw fitness at this stage
Everyone responds to altitude differently, so it's worth saying clearly: this isn't a guarantee that you will or won't feel effects here. It simply tends to be the point where altitude starts influencing how the trek feels, regardless of how strong your legs are.
Day 5 - Jimilangtsho to Simkota Tsho: The High-Altitude Day
This stage runs about 11 km over roughly 4 hours, passing Janetsho Lake and stretches of dwarf rhododendron before reaching the Simkota Tsho campsite. Elevation here is reported differently across itineraries - commonly somewhere between 4,040 m and 4,110 m, so check your specific operator's figure rather than assuming one fixed number.
Is Day 4 the Hardest Day?
It's genuinely one of the harder days, thanks to a combination of:
- Higher altitude than any previous camp
- Thinner air and less available oxygen
- Continued elevation gain on top of several days of accumulated fatigue
- Colder overnight temperatures
- Tiredness building up from three previous trekking days
That said, it wouldn't be accurate to call this simply "the hardest day" outright - the final pass day that follows is arguably just as demanding, for different reasons.
Day 6 - Simkota to Thimphu: Highest Pass and Long Descent
The final trekking day is where the route hits its highest point - often called Labana La or a similarly named pass - sitting at approximately 4,200 m, with some route descriptions listing figures as high as 4,210-4,235 m. From there, the trail descends past Phajoding Monastery and continues down toward Thimphu, covering anywhere from roughly 10 to 15 km depending on the exact route, over about 6-7 hours.
Day 7 - Thimphu to Paro and Departure
This is the day of the Druk Path Trek. You will be traveling from Thimphu back to Paro. Then you will get ready to leave Bhutan. The Druk Path Trek is pretty easy on this day. You do not have to do any hikes on Day 7.
The hard parts of the Druk Path Trek are really from Day 2 to Day 6. That is when the Druk Path Trek is challenging. The whole Druk Path Trek is not hard for all seven days. The Druk Path Trek is only tough, for a days.
Why the Final Day Can Be Physically Challenging
- You start the day already at high altitude
- The early climb to the pass is demanding, often the steepest push of the whole day
- It's frequently the longest single distance of the trek
- The long descent afterward brings its own fatigue - different muscles, different strain
- Tired knees and ankles from several consecutive trekking days make the downhill stretch feel harder than it would fresh.
Reaching Thimphu marks the end of the trekking portion of the route, and most trekkers describe a mix of relief and genuine satisfaction at this point - it's a real accomplishment even at "moderate" difficulty.
What Fitness Level Do You Need for the Druk Path Trek?
If you're specifically wondering about Druk Path Trek fitness level, here's what generally helps:
- Reasonable cardiovascular fitness - regular walkers, hikers, or cyclists tend to do well
- The ability to walk continuously for several hours without needing extended rest
- Reasonably strong legs, since both uphill and downhill sections add up
- Decent balance for uneven, rocky trail sections
- General comfort with sustained uphill walking, not just flat terrain
You Should Be Comfortable With:
- 4-7 hours of walking on a given day
- Multiple consecutive trekking days without a full rest day in between
- Both uphill and downhill walking, often on the same day
- Walking and functioning at altitudes above 3,500-4,000 m
- Carrying a daypack with your daily essentials
How to Train for the Druk Path Trek
If you're asking about Druk Path Trek preparation getting yourself in shape ahead of time can make a difference in how much you enjoy the trek instead of just trying to get through it. The best idea is to start getting 8 to 12 weeks before the trek. Use a mix of walking hiking on different types of land climbing stairs cycling, simple strength training and longer walks on weekends. These things help build the energy and strength you need for the trail.
For cardio training slowly work up to being able to do activity for about 2 to 4 hours without stopping. You don't need to run races or worry about speed. Keeping a pace is more important because trekking means walking for many hours each day.
Leg strength is also very important for climbing up and going down. Easy exercises like squats, step-ups, lunges and calf raises can help build the muscles you need during the trek. Make sure to do these exercises as part of your training.
You should also practice walking up hills and down hills. Walking up hills improves your heart and leg strength while walking down hills gets your knees and ankles ready for the parts. Downhill parts can be really tiring especially if you have never done it before so getting used to them ahead of time can help make the trek easier.
Lastly practice walking with a daypack that's similar, to the one you plan to carry during the trek. Even a heavy backpack can change how you stand, move and feel. Training with your pack before the trek helps your body get used to the weight and lets you see any comfort problems before you start the trail.
Druk Path Trek and Altitude Sickness
The Druk Path Trek is really tough because of the altitude. The Druk Path Trek route is high up for days it is above 3,500 meters, and it even goes up to around 4,200 meters at the highest point. When you are at an altitude, your body needs time to get used to the lower oxygen levels. If you climb too high and too fast, you might get altitude sickness. The Druk Path Trek guides watch out for this.
They look out for signs like a headache. Feeling sick or being very tired or dizzy or not wanting to eat. These signs are important. You should not ignore them. If you ignore these signs when you are on the Druk Path Trek, things can get really bad. That is why the guides make sure you climb at a pace and get used to the altitude on the Druk Path Trek.
How to Reduce Altitude-Related Risk?
- Ascend gradually where the itinerary allows it
- Stay well hydrated throughout each day
- Avoid overexerting yourself, especially on the first couple of days
- Listen closely to your guide's pacing advice
- Give yourself proper acclimatization time rather than rushing
- Report any concerning symptoms early rather than waiting to see if they pass
- Be willing to descend if a qualified guide or professional advises it.
This isn't a substitute for medical advice - if you have underlying health conditions or concerns about high-altitude travel, it's worth speaking with a doctor before you book.
What Makes Druk Path Trek Physically Challenging?
The Druk Path Trek can be physically challenging because it combines uphill and downhill walking, high altitude, and long trekking days. The uphill sections can be demanding, especially during the first few days when the trail gains elevation quickly. Downhill walking is generally less demanding on the lungs but can put extra pressure on the knees and legs, particularly after several hours of trekking. Altitude is another major challenge because the route reaches above 4,000 meters, where walking can feel harder due to the thinner air. The trek does not usually require technical climbing skills, but uneven and rocky trails can still require careful footing.
Trail navigation is generally manageable when trekking with a guide, while longer walking days can lead to tiredness as the trek progresses. Finally, weather conditions can vary, with cold temperatures, rain, wind, or snow potentially making the trail more difficult.
Is Druk Path Trek Harder Than Other Bhutan Treks?
Keeping this brief, since it's not the focus of this guide: Bhutan's official tourism resources generally rate the Druk Path Trek as medium difficulty, while longer routes like the Jomolhari Trek and the Snowman Trek are rated considerably harder, largely due to length, sustained high altitude, and remoteness.
If you're looking for something gentler than Druk Path, the Dagala Thousand Lakes Trek is often positioned as a comparable or slightly easier alternative, depending on the exact itinerary. For a shorter high-altitude outing without a multi-day commitment, trekking to Taktsang Monastery (Tiger's Nest) is a good single-day comparison point, since many Druk Path itineraries actually use it as an acclimatization hike before the trek begins.
Tips for Making the Druk Path Trek Easier
- Train consistently in the months before you go - don't leave it to the last few weeks.
- Build your endurance gradually rather than jumping straight into long sessions.
- Don't rush uphill sections - slow and steady beats fast and exhausted.
- Take short, regular breaks rather than pushing through in long stretches.
- Stay hydrated throughout each day, not just when you feel thirsty.
- Pack light - every extra kilogram matters more at altitude.
- Wear trekking shoes that are already broken in before the trip.
- Bring proper layers, since temperatures swing a lot between day and night.
- Use trekking poles if you're comfortable with them, especially on descents.
- Follow your guide's instructions on pacing and altitude - they know the route and conditions better than any guidebook.
What to Pack for a Moderate High-Altitude Trek?
For a trek that's not too easy and not too hard you need to pack the things you will really need. You have to be ready for the weather to change for days of walking and for the cold. First you need to have trekking shoes that are comfortable and have a good grip. You should also bring clothes for the cold nights when you are at the camp and a jacket that is waterproof in case it rains or is windy.
When it gets really cold gloves and a warm hat are very useful. When the sun is strong you need sunglasses and sunscreen to protect yourself. You should also have a water bottle that you can trust and a daypack that is big enough to carry the things you need for the day. If you are used to using trekking poles you should bring them for the parts that are steep or not even.
When Is the Druk Path Trek Easier?
The Druk Path Trek can be very hard or a little easier depending on the time of year. The trail can be different in each season. The way the path looks the weather and how clear it is all make a difference in how easy or hard the trek feels. Spring is usually a time because the path is clearer there are lots of rhododendrons in bloom and the weather is more stable. This makes the trek more enjoyable.
Autumn is also a time because the skies are clearer you can see the mountains better and the conditions for trekking are usually good. Winter can make the trek harder because the temperature drops a lot especially at higher camps. There might be snow on the path, which makes it harder to walk. The monsoon season is not the time either because the rain can make the path very muddy and slippery. Clouds and mist can also make it hard to see. The tourism authorities in Bhutan usually say that the best times for the Druk Path Trek are from mid-March to mid-June and from October to November. These times are better because the path is, in shape the temperatures are nicer and the visibility is better.
Frequently Asked Questions About Druk Path Trek Difficulty
Is Druk Path Trek difficult?
It's generally considered a moderate trek - not technically difficult, but physically demanding due to altitude, elevation gain, and several consecutive walking days.
Is Druk Path Trek suitable for beginners?
It can be, provided the beginner has good general fitness and puts in real preparation beforehand. Being new to trekking isn't automatically disqualifying, but showing up unprepared makes the trek considerably harder.
What is the highest altitude of Druk Path Trek?
Approximately 4,200 m, though exact figures vary slightly between route descriptions, with some sources citing points as high as around 4,235 m.
How many hours do you walk each day on Druk Path Trek?
Typical trekking days range from roughly 3 to 7 hours, depending on the specific stage and itinerary - the final pass day is usually the longest.
What is the hardest day of Druk Path Trek?
Day 1 involves the steepest elevation gain and is widely considered one of the toughest days, but the final high-altitude pass day can be equally demanding for different reasons. It's not accurate to label just one day as universally hardest.
Do I need previous trekking experience?
Not strictly -technical trekking experience generally isn't required for this route. What matters more is genuine physical preparation and a realistic understanding of what altitude does to your energy levels.
How do I train for Druk Path Trek?
A combination of cardio (walking, hiking, cycling), stair climbing, basic leg-strength exercises, and practicing with a loaded daypack in the weeks before your trip goes a long way.
Is altitude sickness a risk on Druk Path Trek?
Yes, it's a genuine consideration since the route spends multiple days above 3,500 m and peaks around 4,200 m. Gradual pacing, hydration, and listening to your guide all help manage the risk, though no trek can guarantee you won't feel any effects.
How long is the Druk Path Trek?
Most itineraries run around 4-6 trekking days, though this varies by operator - some stretch the route into 6 or 7 days with gentler stages, others compress it into fewer, longer days.
Final Verdict: Is Druk Path Trek Right for You?
The Druk Path Trek can be a choice if you like hiking and want to see Bhutan's mountains without doing one of the really hard treks. The Druk Path Trek is moderate, so you do not need to be a trekker. You should still get ready properly because the Druk Path Trek has days of walking, uphill and downhill parts, uneven trails, and high altitudes. If you are fairly active and can walk for hours, that is a good start.
For people who're new to trekking, getting ready is the key. Start walking before your trip, practice walking uphill or on stairs, and get used to your hiking shoes and backpack. Importantly, do the Druk Path Trek at your own pace. You do not need to be fast. Enjoy the forests, lakes and mountain views. Give your body time to adjust.
If the Druk Path Trek sounds like the right challenge, our 7-day Druk Path Trek itinerary is built around exactly this kind of gradual acclimatization pattern. And if you'd rather ease into Bhutan's altitude first, browse our full range of Bhutan trekking routes to find the trek that matches where you're starting from.